Main Menu
- Home
- Product Finder
- Calibration Systems
- Calibration Services
- Digital Sensing
- Industrial Vibration Calibration
- Modal and Vibration Testing
- Non-Destructive Testing
- Sound & Vibration Rental Program
- Learn
- About Us
- Contact Us
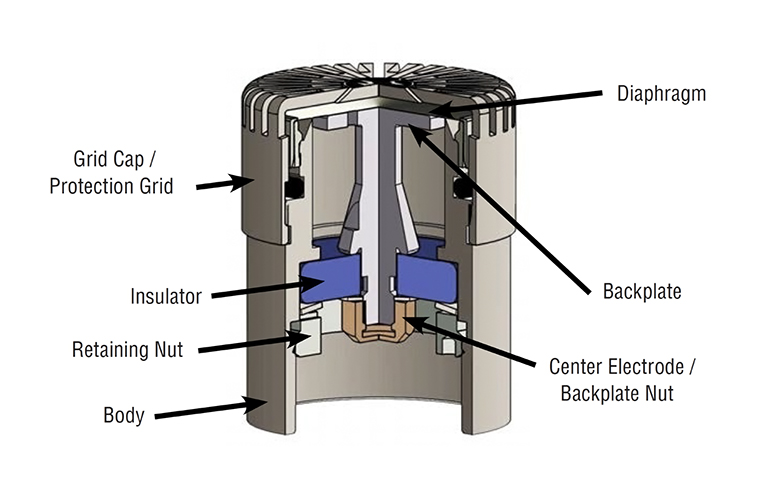
Measurement microphones are precision instruments designed to measure sound pressure in air. Precision condenser microphones consist of a thin metal membrane in close proximity to a solid metal plate. This forms a variable capacitor that converts the motion of the diaphragm to voltage. When the microphone is exposed to a change in pressure, the resulting motion of the diaphragm causes a change in the capacitance of the microphone. The diaphragm displacement is directly proportional to the exposed sound pressure. Precision condenser microphones are the best designs for accurate acoustic testing. They are very stable over time and temperature or humidity fluctuations. The cartridges are standardized to fit onto a wide range of preamplifiers and handheld calibrators. They are the most widely used microphone type for precision sound level meters.

The diaphragm built into a microphone is extremely thin and delicate (approximately 1/8 the thickness of a standard sheet of household aluminum foil), but the device can have a long useful life with proper handling. With years of experience manufacturing and calibrating microphones, The Modal Shop and PCB have found the following handling tips useful for keeping microphones in good working order for many years
The following video from PCB Piezotronics demonstrates these tips